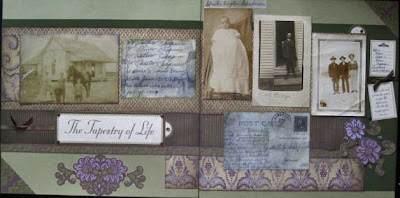
When I make a layout, I rarely pick it out with pictures in mind. I usually do so because I like the paper and layout. I add my pictures afterwards, or pick pictures out after I have decided what to make and then figure out a way to make it work. I have wanted to create this layout from the first time I saw it when
Reflections first arrived at my house. So, when I was getting to the end of my layouts and had lots of scraps left, but not many full sheets of paper, I decided, I was gong to make it. I never once considered the photos. I knew I had a lot of little pictures of my dad, but never dreamed that when I made 16 small squares I would have 16 small pictures of my dad. SURPRISE!!! I was so happy that the two worked together.
The Crop-A-Dial made this so much faster than the old way of pounding in eyelets with a hammer and the setting tool, quieter too. Just remember 3-C for standard eyelets. To punch your holes, it's real scientific. I eyeballed where I wanted my holes to be, drew a dot on my cardstock, grabbed 4 pieces stacked together, punched the hole, and then with my Crop-A-Dial still squeezed together, set the guide on the hole punching side so each other hole would be punched at the same depth. No more measureing. To set the eyelet, it's as easy as unlocking your front door. You need to put your key in the hole in your door to unlock your house. So with your Crop-A-Dial, you need to put the "stem" of the crop-a-dial or "KEY" in the hole of your eyelet, and the eyelet in the hole of your paper, before you squeeze and "unlock" the magic of the tool, by setting your eyelet. SIMPLE!
At the top of each piece of Close To My Heart's Background and Texture paper, are Zip Strips. One side of the Zip Strip contains identification information on the paper pack that the paper is from, such as colors used in that paper pack and the product name and number. The other side is useable with a printed border, alphabet, or words. When my layout was complete, it needed something else, I added the Zip Strips to the far left and right edges of each side and purple Sparkles to the Zip Strips.
Something else I have decided to do, thanks to my friend Candice is start using some of my old letter stickers. WOW were they a waste of money. I have gotten so used to using My Acrylix clear Stamps, Quickutz, Sizzix, and even Sandy's Accucut, that I just quit using the gazillion stickers I had bought over the years before these great machines and my clear stamps. This layout used five letters and I would have had to buy one alphabet just to get those 5 letters. Those days are over. PLUS with CTMH's My Acrylix and our blocks, they're super-simple to align. Our blocks have a laser cut line etched into the block. It is going to be hard using the stickers, but I'm determined to use some of the things I spent money on and get rid of them--creating more space in my craft room. We'll see how long that lasts!
Products Used
X7143B Sonoma Paper Pack
C1465 Unscripted
Z1686 CTMH Cricut Art Philosophy Cartridge (For the little title tag on the right page.)
Exclusive Inks Stamp Pads: Z2100 Amethyst, Z2114 Cocoa, Z2137 Olive and Z2147 Smokey Plum
Z1326 Sparkles--Red, Pink, and Purple Assortment
Z1360 Designer Brads
Z697 Sponge
Z534 Microtip Scissors
Z1471 CTMH Ruler
Z1151 3-D Foam Tape
1772 Glue Dots (sometimes old photos have a hard time sticking to a page and I use a Glue Dot to keep them down.)
9031 Reflections (Check
my website for availabilty. These books are being discontinued and are only available while supplies last. They are FANTASTIC resources!)
Discontinued CTMH Embroidery Floss Green Assortment
Discontinued CTMH Eyelets
Crop-A-Dile (The ONLY way to set alot of eyelets!)
Assorted Cardstocks used on other layouts
K and Co stickers


